Redirect from one page to a specific slide (using SplideJS URL Hash Navigation) in another page

After a lot of failures, i managed to mount the SplideJS extension to in existing Slider element.

The code below is placed in a code element in the same page as the slider element.
Don’t forget to replace ‘SliderID’ with the ‘data-script-id’ value of your own slider.

It seems that the timout is mandatory, it’s not working anymore if i remove it.

<script src="
https://cdn.jsdelivr.net/npm/@splidejs/splide-extension-url-hash@0.3.0/dist/js/splide-extension-url-hash.min.js
"></script>

<script>
document.addEventListener('DOMContentLoaded', (event) => {
  setTimeout(() => {
    const instance = window.bricksData?.splideInstances['sliderID'] || false
    instance.destroy(true);
    instance.mount(window.splide.Extensions);
  }, 250)
})
</script>

ISSUE :

Now, i can see the url hash changing when i swipe the slides on my test page.

Currently, i have generated 3 hash links :

mywebsiteurl/home/#01
mywebsiteurl/home/#02
mywebsiteurl/home/#03

My goal is to add a custom redirect link to images in a gallery (page A) so when i click on it, it redirects the user so the corresponding slide (with the hash nav url) in the slider (page B).

Is this supposed to work this way or do i need to tweak the script in some ways so it could allow the redirection from another page ?

Greetings,
SOLUTION :

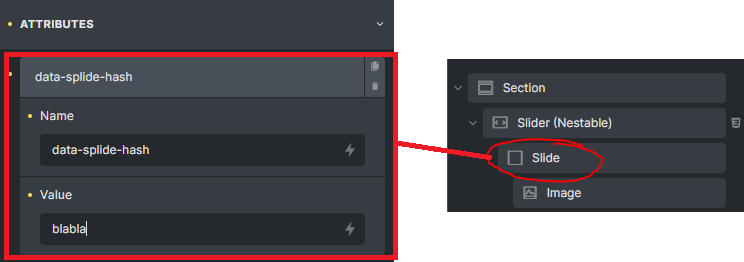
I changed the custom hash from 0x to a string (blabla-my-photo-text) and now it’s working fine ! I will test again with the initial structure to double check if it’s really a bug or if i failed somehting but anyway, now it’s working fine !

So, if you want to use the slider element with url nash nav, this is one way to achieve it :slight_smile:

STEP BY STEP TUTO :

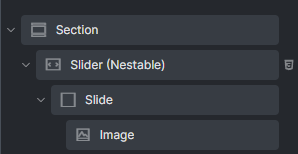
1 - Use a Slider (Nestable) Element

image

2 - Mount SplideJS extension

Settings > Page Settings > Custom Code > Body (Header) Scripts

Put this code :

<script src="
https://cdn.jsdelivr.net/npm/@splidejs/splide-extension-url-hash@0.3.0/dist/js/splide-extension-url-hash.min.js
"></script>

<script>
document.addEventListener('DOMContentLoaded', (event) => {
  setTimeout(() => {
    const instance = window.bricksData?.splideInstances['xntjaq'] || false
    instance.destroy(true);
    instance.mount(window.splide.Extensions);
  }, 10)
})
</script>

Don’t forget to modify splideInstances[‘xxxx’] with your own data-script-id value

image

3 - Add custom attributes

Add custom attributes to each Slide of the Slider element

4 - It’s done

Now you can use links to redirect from another page to a specific slide of your nestable slider element !