Once I’ve added a particular class to several elements, how do I style one of those elements for the others to automatically update their styling, similar to Oxygen Builder?
Bricks is currently lacking this functionality. It’s on the wish list and has many upvotes, so fingers crossed.
Meanwhile you may want to take a look at Microthemer, which would allow you to assign a class to any element in Bricks – and then style the element in Microthemer.
Easy and powerful. To me, worth every penny. Haven’t tried it with Bricks yet but it works with Elementor and any other WordPress theme, so I see no reason why Bricks would be any different.
I’m a beginner without coding experience but always happy to follow a guide.
I can kinda understand how to inspect elements using google chrome. I’ve also got some software called Hoverify. It allows me to get the CCS values.
My questions, if ok.
- How can I add variable classes to Bricks and use them on my website?
- How do I then switch to the class id and class?
- how do I add more than one class?
I may be wrong but please correct anything that I’m saying wrong, please. (don’t be shy as it’ll help me learn).
- Do I first add the code to the global settings in the WordPress dashboard?
- Go to the element and type the name of the class and it’ll take on the value.
Are you ok to do a short video or guide so that I can see it in action on a button or a card/icon box. Can you use box-shadow or margin/padding if possible?
I’m thinking that rather than copying and pasting the styles, just set a class.
I’m not an expert either, but let me try to answer at least some of your questions.
First off, if you’re mainly looking to style buttons or all icon boxes in a certain way you may not even need to use custom CSS classes.
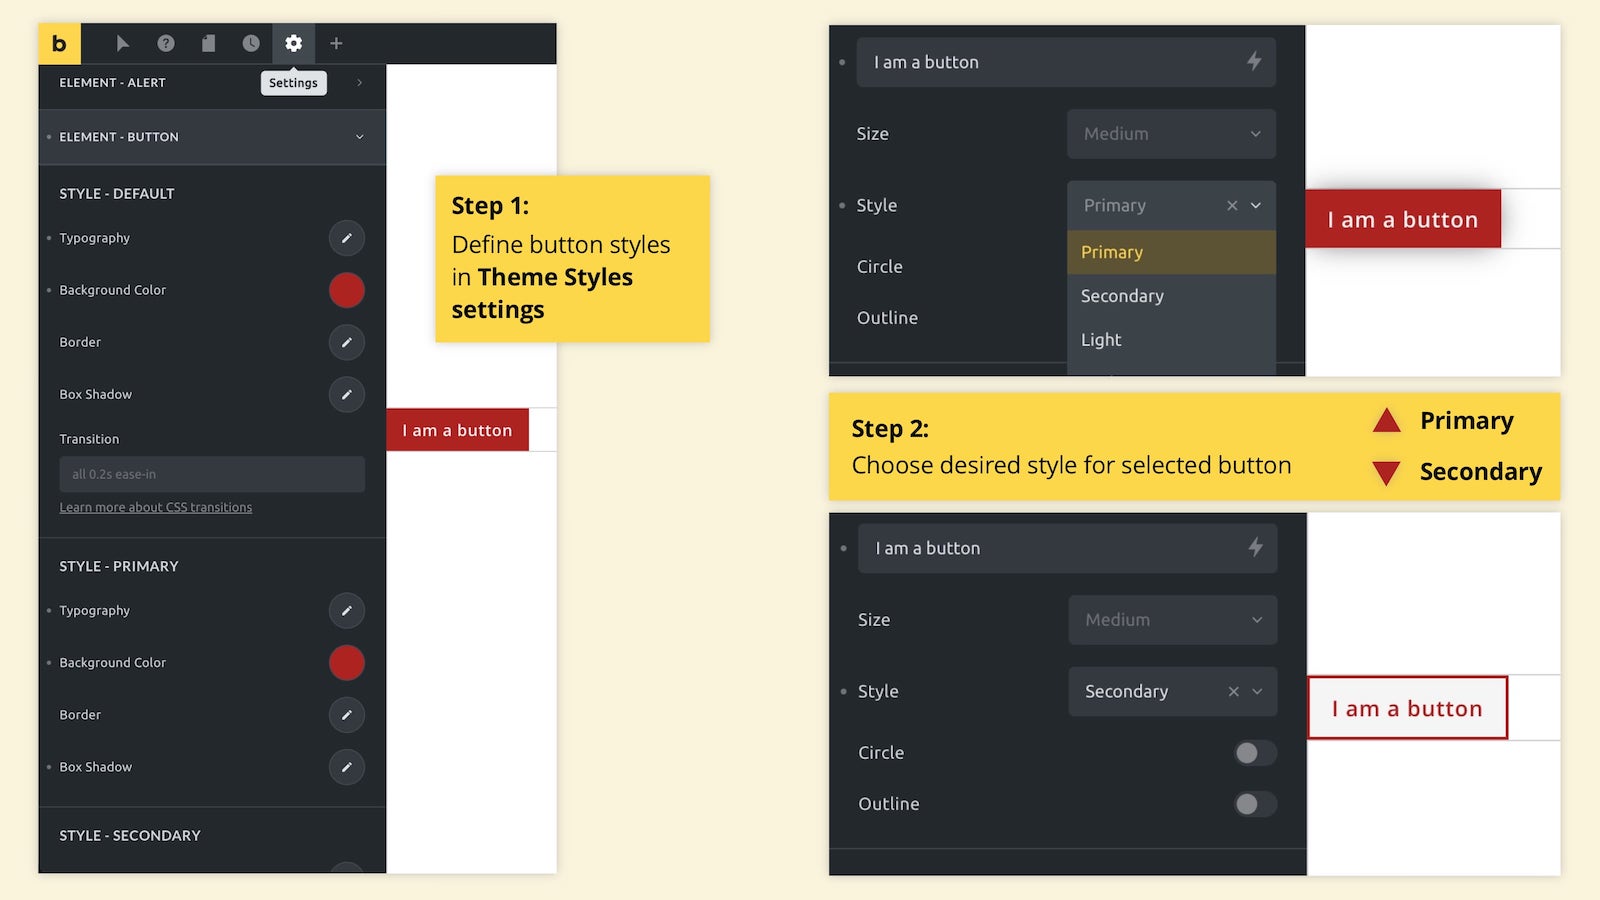
The Theme Styles settings that Bricks offers for many elements are quite powerful. You can, for example, create different button styles as well as default styles for image galleries, forms, headings etc. I’ve attached an image to illustrate two different button styles.
As for CSS classes, you can either code them manually or use a tool like Microthemer. If you are comfortable writing CSS code manually you can just add it in the WordPress backend under Bricks > Settings > Custom Code > Custom CSS. Name your class, then in Bricks add it to the element you want to style, and you’re done.
Personally, I find Microthemer much easier, especially when it comes to responsive styling to accommodate different screen sizes – e.g. when a container needs to be, say, 70% wide on a desktop screen, 50% on tablet, 100% on mobile etc.
One caveat is that Microthemer does not seem to play along with Bricks as nicely as it does with Elementor or Oxygen, in my experience. (There are some issues in preview mode, for example.) Still, the basic functionality works and is, for me, a great help.
If you’re using Microthemer you can simply name a class for an element, save this class as a so-called selector in Microthemer and start styling the way you like it. The screenshot shows an image with box shadow and yellow border as an example.
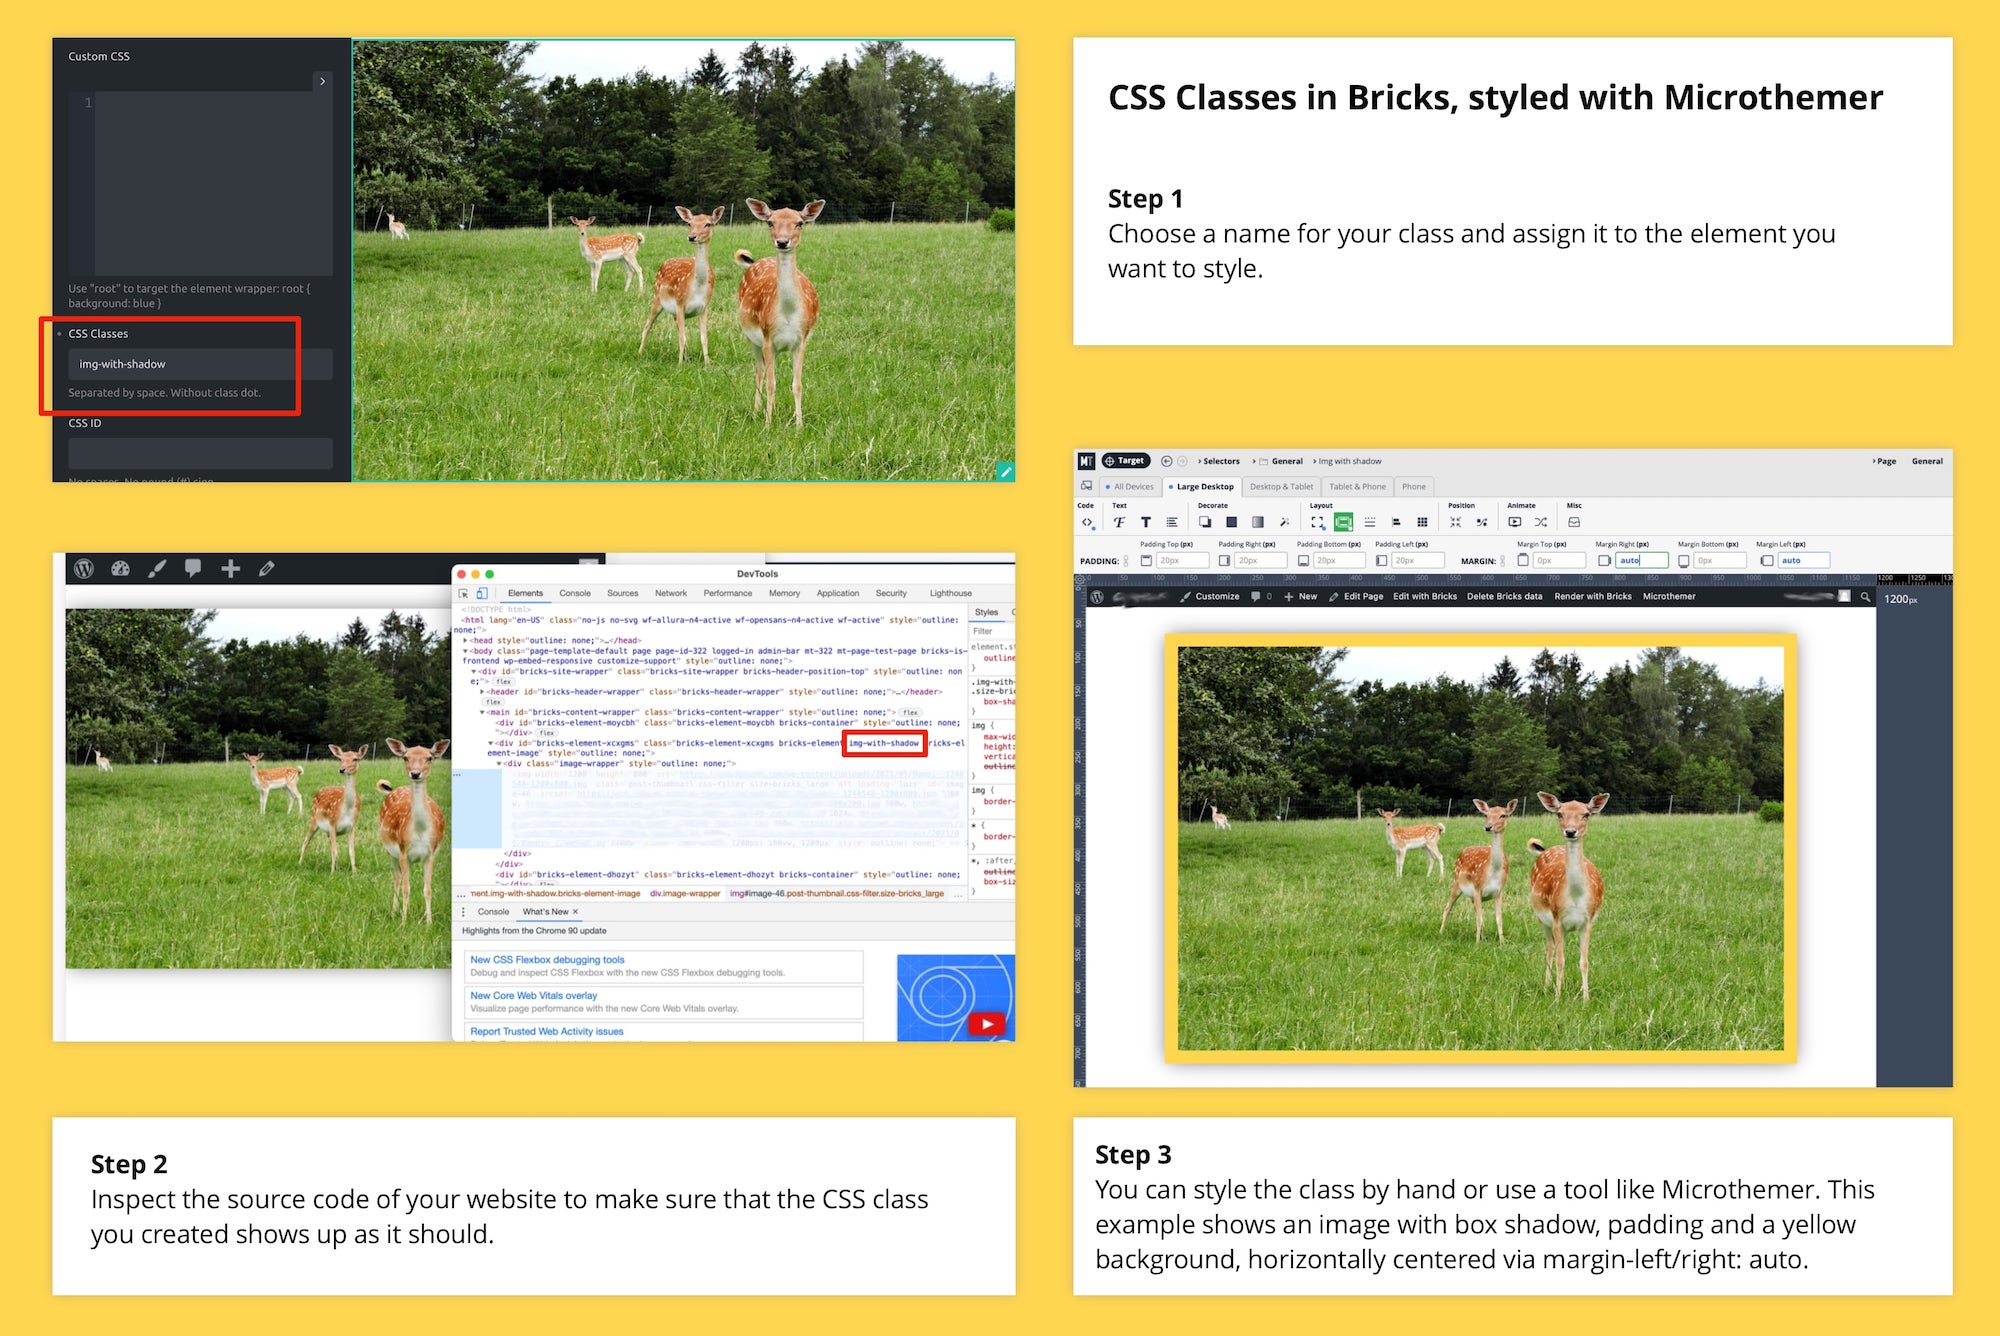
To use the same styling for other images, you’d simply add the same class name in another image’s Custom CSS > CSS Classes field.
The same approach should work for IDs. Not sure about mutiple CSS classes, sorry. Still, I hope this helps.
1 Like
Thanks for replying.
I actually put forward a suggestion to work work with Microthemer or do something similar.
I’m planning on buying Microthemer but probably won’t be for another 6 months due to affordability.
I think that I can follow youtube video’s to get the code but sure how to add the classes.
Would you know how by any chance?
Not sure I understand the question – or perhaps I wasn’t clear enough in my answer?
You add CSS classes in any element’s Custom CSS > CSS Classes field.
You can define them in the WordPress backend under Bricks > Settings > Custom Code > Custom CSS or via a tool like Microthemer.
Here’s the sample code that Microthemer created for the image with yellow border (padding) and shadow:
.img-with-shadow {
box-shadow: 0 0 30px -5px !important;
background-color: rgb(255, 214, 79) !important;
padding: 20px !important;
max-width: 80% !important;
margin-right: auto !important;
margin-left: auto !important;
}
To assign this class to an image you would add img-with-shadow [no dot] to any image’s Custom CSS > CSS Classes field.
The “!important” part makes sure that the class supercedes other settings in Bricks. In somes cases you may not want this. So it’s a good idea to experiment with the code.
A really good source of info for CSS & HTML is Mozilla, the non-profit that’s behind the Firefox browser:
To easily generate code for box shadows you can use a tool like this:
Good luck!
It was me not understanding but I do now. I just tried it out and worked a treat.
Thanks very much, I really apprectate it!!
Glad to hear that. Good luck with your project!